Image Effects
Blur
New in version 0.4.5.
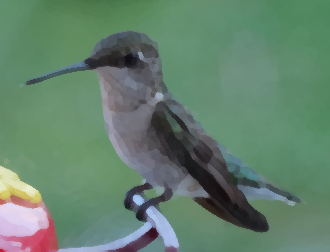
Basic blur operation. The radius argument defines the size of the area to
sample, and the sigma defines the standard deviation. For all blur based
methods, the best results are given when the radius is larger than
sigma. However, if radius is omitted, or zero valued, the value
will be selected based off the given sigma property.
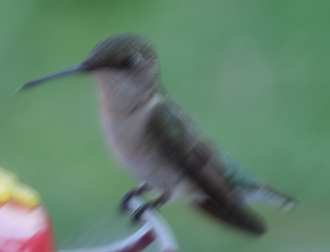
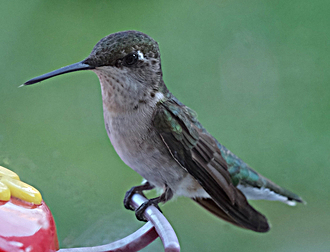
with Image(filename="hummingbird.jpg") as img:
    img.blur(radius=0, sigma=3)
    img.save(filename="effect-blur.jpg")
| Original | Blur |

|

|
Adaptive Blur
New in version 0.5.3.
This method blurs less intensely around areas of an image with detectable edges,
and blurs more intensely for areas without edges. The radius should
always be larger than the sigma (standard deviation).
from wand.image import Image

with Image(filename="hummingbird.jpg") as img:
    img.adaptive_blur(radius=8, sigma=4)
    img.save(filename="effect-adaptive-blur.jpg")
| Original | Adaptive Blur |
|
|

|
Gaussian Blur
New in version 0.3.3.
Smooths images by performing a Gaussian function. The sigma argument is
used to define the standard deviation.
from wand.image import Image

with Image(filename="hummingbird.jpg") as img:
    img.gaussian_blur(sigma=3)
    img.save(filename="effect-gaussian-blur.jpg")
| Original | Gaussian Blur |
|
|

|
Motion Blur
New in version 0.5.4.
Performs a Gaussian blur operation along a linear direction to simulate a
motion effect. The radius argument should always be larger than the
sigma argument, but if the radius is not given (or 0 value) the
radius value is selected for you.
from wand.image import Image

with Image(filename="hummingbird.jpg") as img:
    img.motion_blur(radius=16, sigma=8, angle=-45)
    img.save(filename="effect-motion-blur.jpg")
| Original | Motion Blur |
|
|
|
Rotational Blur
New in version 0.5.4.
This method simulates a motion blur by rotating at the center of the image.
The larger the angle, the more extreme the blur will be.
Unlike the other blur methods, there is no radius or sigma arguments.
The angle parameter can be between 0° and 360° degrees
with 0° having no effect.
from wand.image import Image

with Image(filename="hummingbird.jpg") as img:
    img.rotational_blur(angle=5)
    img.save(filename="effect-rotational-blur.jpg")
| Original | Rotational Blur |
|
|

|
Selective Blur
New in version 0.5.3.
Similar to Image.blur() method, this
method will only effect parts of the image that have a contrast below a given
quantum threshold.
from wand.image import Image

with Image(filename="hummingbird.jpg") as img:
    img.selective_blur(radius=8,
                       sigma=3,
                       threshold=0.25 * img.quantum_range)
    img.save(filename="effect-selective-blur.jpg")
| Original | Selective Blur |
|
|

|
Despeckle
New in version 0.5.0.
Despeckling is one of the many techniques you can use to reduce noise on a given image. Also see Enhance.
from wand.image import Image

with Image(filename="hummingbird.jpg") as img:
    img.despeckle()
    img.save(filename="effect-despeckle.jpg")
| Original | Despeckle |
|
|

|
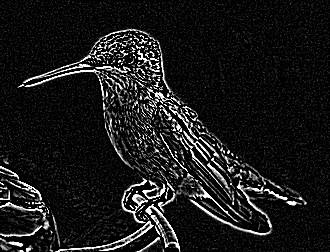
Edge
New in version 0.5.0.
Detects edges on black and white images with a simple convolution filter. If used with a color image, the transformation will be applied to each color-channel.
from wand.image import Image

with Image(filename="hummingbird.jpg") as img:
    img.transform_colorspace('gray')
    img.edge(radius=1)
    img.save(filename="effect-edge.jpg")
| Original | Edge |
|
|
|
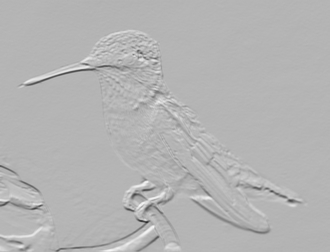
Emboss
New in version 0.5.0.
Generates a 3D effect that can be described as print reliefs. Like Edge, best results can be generated with grayscale image. Also see Shade.
from wand.image import Image

with Image(filename="hummingbird.jpg") as img:
    img.transform_colorspace('gray')
    img.emboss(radius=3.0, sigma=1.75)
    img.save(filename="effect-emboss.jpg")
| Original | Emboss |
|
|
|
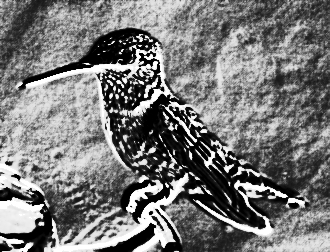
Kuwahara
New in version 0.5.5.
Warning
Class method only available with ImageMagick 7.0.8-41 or greater.
The kuwahara() method applies a smoothing filter
to reduce noise in an image, but also preserves edges.
from image.wand import Image

with Image(filename="hummingbird.jpg") as img:
    img.kuwahara(radius=2, sigma=1.5)
    img.save(filename="effect-kuwahara.jpg")
| Original | Kuwahara |
|
|
|
Shade
New in version 0.5.0.
Creates a 3D effect by simulating light from source where aziumth controls
the X/Y angle, and elevation controls the Z angle. You can also determine
of the resulting image should be transformed to grayscale by passing gray
boolean.
from wand.image import Image

with Image(filename="hummingbird.jpg") as img:
    img.shade(gray=True,
              azimuth=286.0,
              elevation=45.0)
    img.save(filename="effect-shade.jpg")
| Original | Shade |
|
|
|
Sharpen
New in version 0.5.0.
Convolves an image with a Gaussian operator to enhance blurry edges into a more
distinct “sharp” edge. The radius should always be larger than sigma
value. The radius value will be calculated automatically if only sigma is
given.
from wand.image import Image

with Image(filename="hummingbird.jpg") as img:
    img.sharpen(radius=8, sigma=4)
    img.save(filename="effect-sharpen.jpg")
| Original | Sharpen |
|
|

|
Adaptive Sharpen
New in version 0.5.3.
Just like Image.sharpen(), adaptive
sharpen uses a convolve & Gaussian operations to sharpen blurred images.
However, the effects of
Image.adaptive_sharpen()
are more intense around pixels with detectable edges, and less farther away
from edges. In the example below, notice the visible changes around the edge of
the feathers, and limited changes in the out-of-focus background.
from wand.image import Image

with Image(filename="hummingbird.jpg") as img:
    img.adaptive_sharpen(radius=8, sigma=4)
    img.save(filename="effect-adaptive-sharpen.jpg")
| Original | Adaptive Sharpen |
|
|
|
Unsharp Mask
New in version 0.3.4.
Identical to Image.sharpen method,
but gives users the control to blend between filter & original (amount
parameter), and the threshold. When the amount value is greater than
1.0 more if the sharpen filter is applied, and less if the value is under
1.0. Values for threshold over 0.0 reduce the sharpens.
with Image(filename="hummingbird.jpg") as img:
    img.unsharp_mask(radius=10,
                     sigma=4,
                     amount=1,
                     threshold=0)
    img.save(filename="effect-unsharp-mask.jpg")
| Original | Unsharp Mask |
|
|
|
Spread
New in version 0.5.3.
Spread replaces each pixel with the a random pixel value found near by. The size of the area to search for a new pixel can be controlled by defining a radius.
from wand.image import Image

with Image(filename="hummingbird.jpg") as img:
    img.spread(radius=8.0)
    img.save(filename="effect-spread.jpg")
| Original | Spread |
|
|

|