Morphology
Morphology modifies an image by evaluating the pixel values surrounding each pixel. The basic Wand method signature is:
img.morphology(method, kernel, iterations)
Where method is the operation to apply, and is defined by
MORPHOLOGY_METHODS. The kernel can include predefined
built-in shapes, or user-defined shapes.
Shapes
Shapes, also known as “kernels”, are small matrices that control morphology method operations. The kernels define the size, and targeted pixels to modify.
To demonstrate a kernel’s shape; let’s generate a simple black canvas around a white pixel.
from wand.image import Image

with Image(width=1, height=1, pseudo='xc:white') as img:
    img.border('black', 6, 6, compose='copy')
    img.save(filename='morph-dot.png')

Built-In Kernels
ImageMagick contains about three dozen pre-built kernels that cover most common morphology uses, as well as a few specific ones leveraged for internal operations. To use built-in kernels, the following string format is required.
label[:arg1,arg2,arg3,..]
Where label is a string defined in KERNEL_INFO_TYPES.
Each label can have additional optional arguments, which are defined
by a comma separated list of doubles. A colon ':' symbol should separate
the label & argument list. For example:
disk:2.5,3,5
Below is a small list of examples for the most common kernel shapes.
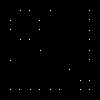
Cross
with Image(filename='morph-dot.png') as img:
    img.morphology(method='dilate', kernel='cross:3')
    img.sample(width=60, height=60)
    img.save(filename='morph-kernel-cross3.png')

Diamond
with Image(filename='morph-dot.png') as img:
    img.morphology(method='dilate', kernel='diamond:3')
    img.sample(width=60, height=60)
    img.save(filename='morph-kernel-diamond3.png')

Disk
with Image(filename='morph-dot.png') as img:
    img.morphology(method='dilate', kernel='disk:5')
    img.sample(width=60, height=60)
    img.save(filename='morph-kernel-disk5.png')

Octagon
with Image(filename='morph-dot.png') as img:
    img.morphology(method='dilate', kernel='octagon:5')
    img.sample(width=60, height=60)
    img.save(filename='morph-kernel-octagon5.png')

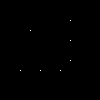
Plus
with Image(filename='morph-dot.png') as img:
    img.morphology(method='dilate', kernel='plus:3')
    img.sample(width=60, height=60)
    img.save(filename='morph-kernel-plus3.png')

Ring
with Image(filename='morph-dot.png') as img:
    img.morphology(method='dilate', kernel='ring:5,4')
    img.sample(width=60, height=60)
    img.save(filename='morph-kernel-ring5.png')

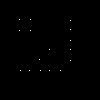
Square
with Image(filename='morph-dot.png') as img:
    img.morphology(method='dilate', kernel='square:3')
    img.sample(width=60, height=60)
    img.save(filename='morph-kernel-square3.png')

Custom Kernels
Users can define their own kernel shape by building a string that follows the format:
geometry:pix1,pix2,pix3,...
Where geometry is defined as WIDTHxHEIGHT of the kernel, followed by a colon, and then a comma separated list of float values. For example:
custom_kernel = """
5x5:
    -,-,1,-,-
    -,1,1,1,-
    -,-,-,-,-
    -,1,-,1,-
    1,1,1,1,1
"""

with Image(filename='morph-dot.png') as img:
    img.morphology(method='dilate', kernel=custom_kernel)
    img.sample(width=60, height=60)
    img.save(filename='morph-kernel-custom.png')

By default, the kernel’s “origin” is calculated to be at the center of the kernel. Users can set the kernel origin by defining ±X±Y as part of the geometry. For example:
top_left_origin = """
3x3+0+0:
    1,1,-
    1,0,0
    -,0,-
"""

bottom_right_origin = """
3x3+2+2:
    1,1,-
    1,0,0
    -,0,-
"""
Methods
Morphology methods are broken into three general groups. Basic methods (such as Erode, Dilate, Open, & Close) are used to increase or reduce foreground shapes. Difference methods (such as Edge In, Edge Out, Top Hat & Bottom Hat) draw pixels around foreground edges. Pattern matching methods (such as Hit and Miss, Thinning & Thicken) add pixels when a kernel is matched.
Morphology is intended for images with a black background, and a white foreground. To demonstrate morphology methods, let’s create a basic binary image. We can quickly generate a PBM image from bytes-string literal.
pbm = b"""P1
10 10
1 1 1 1 1 1 1 1 1 1
1 1 0 1 1 0 0 0 0 1
1 0 0 0 1 0 0 1 1 1
1 1 0 1 1 0 0 0 0 1
1 1 1 1 1 0 0 1 1 1
1 1 1 1 0 0 0 0 0 1
1 0 0 0 0 0 0 1 1 1
1 0 1 0 1 0 1 1 1 1
1 0 1 0 1 0 1 1 0 1
1 1 1 1 1 1 1 1 1 1
"""

with Image(blob=pbm, format="PBM") as img:
    img.sample(100, 100)
    img.save(filename="morph-src.png")

The morphology examples below will all use 'morph-src.png' source image.
Erode
Erode reduces matching white pixels, and expands black spaces.
with Image(filename='morph-src.png') as img:
    img.morphology(method='erode', kernel='octagon')
    img.save(filename='morph-erode.png')
Dilate
Dilate increases matching white pixels, and reduces black spaces.
with Image(filename='morph-src.png') as img:
    img.morphology(method='dilate', kernel='octagon')
    img.save(filename='morph-dilate.png')

Open
Open rounds the white edges, but preserves “holes”, or black corners.
with Image(filename='morph-src.png') as img:
    img.morphology(method='open', kernel='octagon')
    img.save(filename='morph-open.png')

Notices the black “inner” corners remain sharp, but the white “outer” corners are rounded.
Close
Close rounds the black edges, and removes any “holes”.
with Image(filename='morph-src.png') as img:
    img.morphology(method='close', kernel='octagon')
    img.save(filename='morph-close.png')

Notices the white “outer” corners remain sharp, but the black “inner” corners are rounded.
Smooth
Smooth applies both Open & Close methods. This will remove small objects & holes, and smooth both white & black corners.
with Image(filename='morph-src.png') as img:
    img.morphology(method='smooth', kernel='octagon')
    img.save(filename='morph-smooth.png')

Edge In
Edge In method performs a Erode, but only keeps the targeted pixel next to a shape. This means the edge is drawn just inside the white of a object.
with Image(filename='morph-src.png') as img:
    img.morphology(method='edgein', kernel='octagon')
    img.save(filename='morph-edgein.png')
Edge Out
Edge Out performs similar to Edge In, but uses the results of Dilate to draw a edge border just outside of an object.
with Image(filename='morph-src.png') as img:
    img.morphology(method='edgeout', kernel='octagon')
    img.save(filename='morph-edgeout.png')
Edge
The Edge method performs both Erode & Dilate methods, but only keeps differences between them as the resulting image. The result is border drawn on the edge of the objects within the image.
with Image(filename='morph-src.png') as img:
    img.morphology(method='edge', kernel='octagon')
    img.save(filename='morph-edge.png')
Top Hat
The Top Hat method performs the Open morphology method, but only returns the pixels matched by the kernel.
with Image(filename='morph-src.png') as img:
    img.morphology(method='tophat', kernel='octagon')
    img.save(filename='morph-tophat.png')
Bottom Hat
The Bottom Hat method performs the Close morphology method, but only returns the pixels matched by the kernel.
with Image(filename='morph-src.png') as img:
    img.morphology(method='bottom_hat', kernel='octagon')
    img.save(filename='morph-bottom_hat.png')
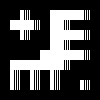
Hit and Miss
The hit-and-miss (a.k.a. HMT) method will remove all pixels from the image, unless a kernel pattern is matched; in which case, the pixel under the matched kernel will be set to white.
with Image(filename='morph-src.png') as img:
    corners = """
    3x3:
        1,1,-
        1,0,0
        -,0,-
    """
    img.morphology(method='hit_and_miss', kernel=corners)
    img.save(filename='morph-hit_and_miss.png')
Thinning
The thinning method removes a pixel when the kernel matches neighboring pixels. When using custom kernels, you can control which pixel should be targeted by setting the X/Y offset of the kernel’s geometry.
with Image(filename='morph-src.png') as img:
    img.morphology(method='thinning',
                   kernel='3x1-0-0:1,1,0',
                   iterations=3)
    img.save(filename='morph-thinning.png')
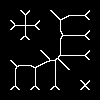
There’s also a special 'skeleton' built-in kernel, paired with -1
iterations to continue to reduce all pixels down to a minimum line.
with Image(filename='morph-src.png') as img:
    img.morphology(method='thinning',
                   kernel='skeleton',
                   iterations=-1)
    img.save(filename='morph-thinning-skeleton.png')
Thicken
The thicken method adds a pixel whenever a kernel matches neighboring pixels. You can control the targeted pixel by defining the offset geometry on custom kernels.
with Image(filename='morph-src.png') as img:
    K = """
    3x3+0+0:
        0,-,-
        -,0,-
        -,-,1
    """
    img.morphology(method='thicken',
                   kernel=K,
                   iterations=4)
    img.save(filename='morph-thicken.png')
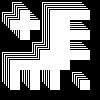
Distance
Distance method is a unique, and very special morphology. Given a binary black & white image, each white pixel will be replace with a color value corresponding to the distance to the nearest edge.
with Image(filename='morph-src.png') as img:
    img.morphology(method='distance',
                   kernel='euclidean',
                   iterations=4)
    img.save(filename='morph-distance-raw.png')

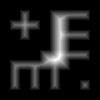
The resulting image is not that special. The pixel values are so low that they
appear black. However, if we use auto_level()
method, we should be able to shift the values across the full grayscale.
with Image(filename='morph-src.png') as img:
    img.morphology(method='distance',
                   kernel='euclidean',
                   iterations=4)
    img.auto_level()
    img.save(filename='morph-distance-auto.png')
Other kernels used for distance morphology are 'chebyshev', 'manhattan',
'octagonal', and 'euclidean'. The basic kernel string format is:
distance_kernel[:radius[,scale]]
For example:
manhattan:5,400